I used to think foot spas were a luxury—something you did at a resort or gifted your mom for her birthday. Meanwhile, my feet endured daily life in sneakers, heels, and flats, accumulating calluses, dryness, and the occasional ache I just ignored. Then I spent a year walking a new city for work, and my feet finally protested. Sore heels, cracked skin, and a general tiredness that no amount of lotion could fix.
A friend—the kind who actually takes care of herself—invited me over for a “foot spa night.” She pulled out a basin, some salts, a few tools, and within an hour, my feet felt like they’d been on vacation. It wasn’t complicated. It wasn’t expensive. It was just… intentional.
Here’s everything I learned about why foot spas matter, what you need, and how to create that experience at home.
Why Your Feet Need Regular Spa Treatment?
Let’s start with an uncomfortable truth: your feet work harder than any other part of your body. They carry your full weight, absorb impact with every step, and spend most of their lives confined in shoes. Yet they get the least attention.
A proper foot soak isn’t just about relaxation—it’s maintenance.
Dead skin builds up. The soles of your feet have thicker skin than anywhere else on your body. Without regular exfoliation, dead cells accumulate into hard calluses that can crack and become painful.
Muscles get tight. Your feet contain 26 bones, 33 joints, and over 100 muscles, tendons, and ligaments. They hold tension just like your shoulders do. Soaking relaxes that tension and improves circulation.
Dryness leads to cracks. Feet have fewer oil glands than hands. They dry out faster and crack deeper. Once cracks form, they’re painful and can become infected.
Neglect shows. In sandals, bare feet, or even the gym, neglected feet are noticeable. Regular care keeps them presentable year-round.
A podiatrist once told me: “People spend hundreds on shoes but nothing on the feet inside them. The shoes wear out in a year. The feet need to last a lifetime.”

Essential Tools for a DIY Foot Spa
You don’t need a fancy electric basin to create a professional experience. These basics do the job:
Foot basin or large tub. Any container big enough for both feet with warm water. A plastic basin costs under $10. If you want extra features—massaging rollers, heat—they exist, but they’re not essential.
Epsom salts. Magnesium sulfate relaxes muscles, reduces swelling, and softens skin. Unscented works, but lavender or eucalyptus adds aromatherapy.
Pumice stone or foot file. For exfoliation. Pumice stone is gentler; metal files are more aggressive. Choose based on your callus level.
Foot scrub. Optional but nice. Look for coarse grains (salt or sugar) with moisturizing oils.
Cuticle pusher and nippers. Toenails need the same care as fingernails. Push back cuticles gently; trim only dead skin.
Nail clippers and file. Toenails should be cut straight across to prevent ingrown nails.
Rich foot cream. Thicker than hand lotion. Look for urea, shea butter, or glycerin—ingredients that actually penetrate tough foot skin.
Towel. Two, actually. One for the floor, one for drying.
Cuticle oil. For finishing.
How to Create a DIY Foot Spa: Step by Step
Step 1: Set the Scene
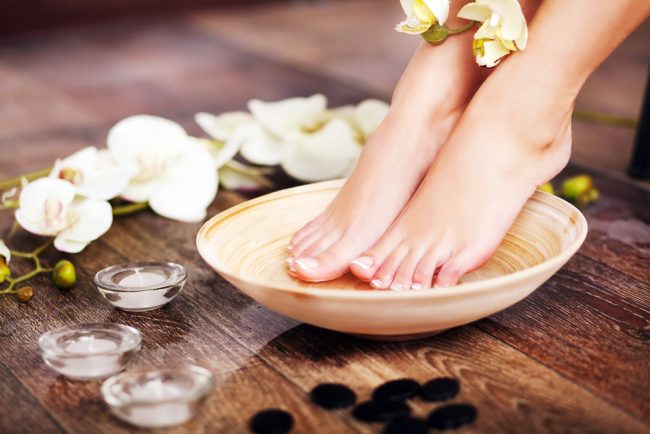
Find a comfortable chair. Lay a towel on the floor to catch drips. Fill your basin with comfortably warm water—test with your elbow, not your foot. Add a generous handful of Epsom salts and swish to dissolve.
Light a candle. Put on music. This is not a rushed activity.
Step 2: Soak
Place both feet in the water. Relax for 10-15 minutes. Not five, not twenty. Fifteen minutes is the sweet spot—long enough to soften skin and relax muscles, short enough to avoid over-softening (prune feet are harder to exfoliate effectively).

If the water cools, add more warm water or keep an electric kettle nearby.
Step 3: Exfoliate
Remove one foot from the water (keep the other soaking). Pat dry with a towel—don’t rub aggressively.
Light pressure only. Let the tool do the work. If it hurts, you’re overdoing it. Pink skin means stop—you’ve reached living tissue.
If using foot scrub, apply in circular motions, paying attention to the same rough areas. Rinse, pat dry, and repeat on the other foot.
Step 4: Tend to Toenails
Trim nails straight across. Curving the corners invites ingrown toenails. Leave a tiny bit of white; cutting too short invites pain and infection.
File edges smooth. Push back cuticles gently with a wooden stick or metal pusher. Never cut living cuticle on toes—the risk of infection is too high. Only snip clearly dead, loose skin if you’re confident.
Clean under the free edge with the pointed end of your pusher or an orangewood stick.
Step 5: Moisturize Generously
This step matters more than any other.
Apply a thick layer of rich foot cream to both feet. Massage it in thoroughly—this isn’t just about moisture, it’s about circulation. Spend extra time on heels and the balls of your feet. Work cream between toes (but not too much—excess moisture between toes can encourage fungus).
Apply cuticle oil to each toenail and massage in.
For intensive treatment: apply an extra-thick layer of cream, put on cotton socks, and sleep in them. Morning feet will be transformed.

Tips for Healthy Feet Between Spas
A weekly foot spa is wonderful, but daily habits keep feet happy:
Moisturize every day. After showering, before bed, whenever you think of it. Feet crave moisture.
Wear proper shoes. Shoes that fit well prevent calluses and corns. Rotate pairs so shoes dry completely between wears.
Change socks daily. Moisture management prevents fungal issues.
Inspect your feet. Especially if you have diabetes or circulation issues. Look for cracks, redness, or changes. Early intervention prevents problems.
Exfoliate weekly. A quick pumice session in the shower prevents buildup from getting out of control.
Keep nails trimmed. Long toenails hit the front of shoes, causing pain and potential damage.
Give feet a break. Go barefoot when safe. Let them breathe and move naturally.
Common Foot Spa Mistakes
Soaking too long. Twenty-plus minutes turns skin to prunes and makes exfoliation less effective. Fifteen minutes is plenty.
Over-exfoliating. Aggressive filing creates sore spots and can actually stimulate thicker regrowth. Gentle, regular exfoliation beats one aggressive session.
Cutting cuticles. Toe cuticles protect against infection. Push, don’t cut.
Rounded toenails. Always cut straight across. Curved corners become ingrown.
Skipping moisturizer. Exfoliation removes dead skin; moisturizer keeps new skin soft. You need both.
Using hand lotion on feet. Hand creams aren’t thick enough for foot skin. Invest in a foot-specific product with urea or shea butter.
When to See a Professional?
Home foot spas work for maintenance, but some issues need a podiatrist:
- Ingrown toenails that are painful or infected
- Thick, discolored, or crumbling nails (possible fungal infection)
- Open sores or wounds on feet
- Severe cracked heels that bleed
- Diabetes or circulation problems (always consult your doctor before aggressive exfoliation)
The Bottom Line
A foot spa isn’t a luxury—it’s maintenance. Fifteen minutes of soaking, gentle exfoliation, and generous moisturizing transforms tired, neglected feet into something soft, healthy, and ready for whatever your day brings.
Your feet carry you everywhere. They absorb every step, every mile, every year. Giving them regular attention isn’t pampering—it’s respect.
And honestly? There’s nothing quite like sliding into bed with soft, smooth feet at the end of a long day.
Read also: Nail Care: The Complete Guide to Healthy and Strong Nails